Field position

Tiling is not a stage of its own: it runs with the Splashback stage, ten of twelve.
It waits on Preparation,
Cabinetry and Benchtops.

Nothing is tiled until the surface beneath it has been proved flat.
Home / Kitchen Renovation Services / Kitchen Tiling
Measure book — service 10

Kitchen tiling and waterproofing in Moorabbin

Tiling is late, measured work. By the time the first box is opened the cabinets are fixed and levelled, the benchtop is in, and the wall behind the cooktop has already been made flat, dry and square. Half of what decides whether a floor or splashback reads well is hidden underneath it — substrate repair, levelling and waterproofing to the wet zone — and the other half is set out with a pencil before any adhesive is mixed.
Under the tile
Old bayside walls are rarely plumb and almost never flat; the packing happens before the tile, not behind it.
01

Flat, sound and dry — in that order

Strip a kitchen in a post-war Moorabbin or Highett house and you generally find three things: a wall that bows away from the bench, a floor that falls a few millimetres toward the back door, and old adhesive beds left from a previous tiler. None of that can be hidden by a tile. Large formats in particular will lip at every join if the surface behind them moves more than a tile bed can absorb, so preparation is treated as its own stage with its own sign-off rather than as the first hour of tiling day.
Waterproofing follows the same logic. The wet zone around the sink and dishwasher is sheeted in a water-resistant board where required, then membraned — carried into the wall and floor junction and dressed around every penetration where a tap, waste or gas line passes through. It is primed, allowed to cure and checked before a single tile is set, because once the tile is on, nothing underneath it can be inspected again without breaking it off.

Old tiles, adhesive beds and loose render taken back to a sound surface

Floors screeded or levelled where the fall is greater than the bed can carry

Water-resistant sheeting to the wet zone behind the sink and dishwasher

Membrane into junctions and around tap, waste and gas penetrations

Primed, cured, then read with a straight edge before setting out begins

Field note 02

Setting out starts from the line you will actually look at
A tiler can start from the corner, or from the line the eye goes to. We set out from the second: the bench plane, the cooktop centre, the window reveal above the sink. Those are the edges a kitchen is read against, so that is where full tiles and symmetrical cuts belong, with the narrow cuts pushed to the end of a run, behind a tall cabinet or below the bench where they are never seen.
Format drives the rest. A large-format tile covers a splashback in two or three pieces but demands a near-perfect wall and leaves little room to correct a bowed run. A small or handmade tile forgives the wall and adds grout lines that become part of the pattern. Finger tiles stacked vertically, subway laid in a straight stack rather than a brick bond, herringbone behind the cooktop only — each changes where the cuts fall, so the pattern is chosen at design stage, not on the morning it is laid.
Height is the other early decision. Tiling to the underside of the overhead cabinets, up to a fixed rail, or full height to the ceiling beside a window all change the tile count and the trim detail — and all of them are worked through on the drawings in Kitchen Design alongside the material choice on Kitchen Splashbacks.
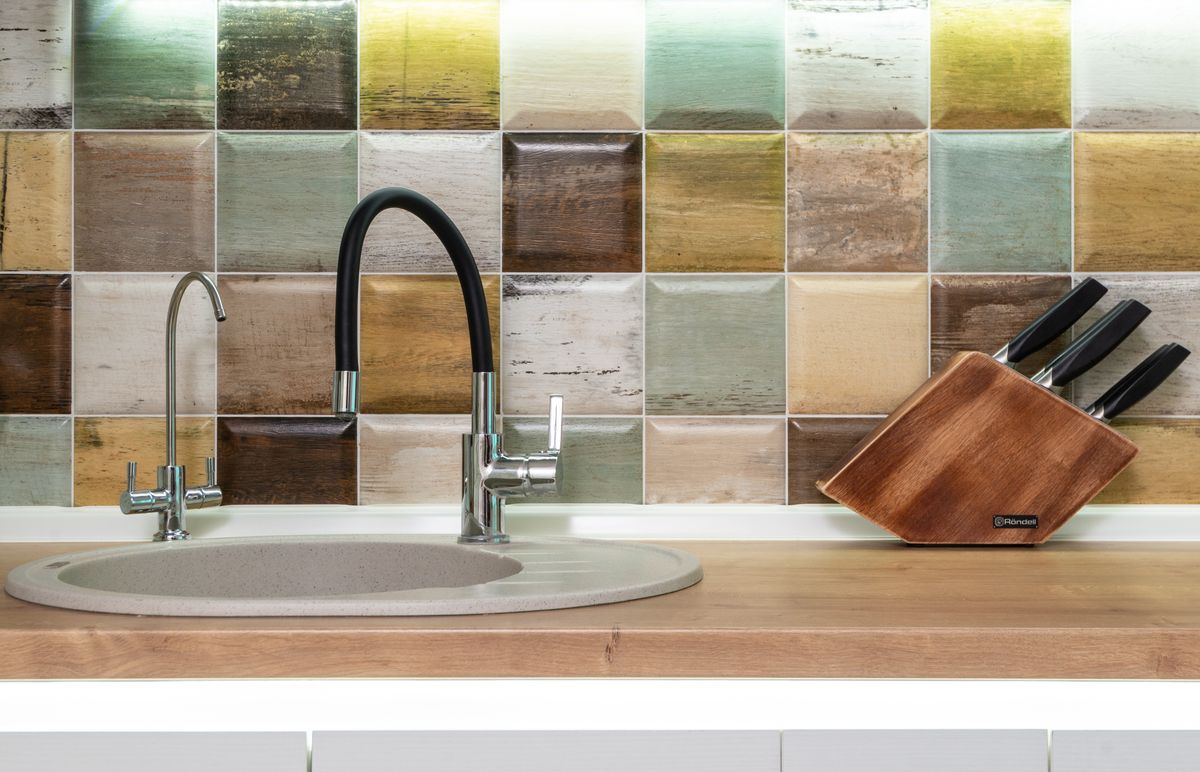
A kitchen sink with chrome faucets sits beneath a multicoloured tiled backsplash on a timber benchtop, beside a wooden knife block.
Reference photograph: small-format tiling set out around a sink and tap penetrations — the zone where waterproofing, cuts and grout colour are all decided together.
Joint width

How much line you want to see

A tight joint reads as a continuous plane and suits rectified, machine-cut tiles. A wider joint is deliberate pattern, and it is also the tolerance that absorbs variation in handmade or pressed tiles. The tile itself usually sets the minimum; the look sets the rest.
Grout colour

Matched, or drawn on purpose

Grout close to the tile colour makes the wall a single surface. A contrasting grout turns the setting-out into a grid, which is unforgiving of any cut that is not square. Grout always dries lighter than it mixes, and a floor grout chosen pale will show traffic sooner than one chosen mid-tone.
Movement & thresholds

Where the floor is allowed to move

Tiled floors need somewhere to expand: a flexible joint at the perimeter, at internal corners and at changes of substrate. The junction to the hallway timber or the adjoining carpet is detailed with a trim or a set-down so the two floors meet flat rather than at a lip.
Order of work
Tiling inherits every error made before it, and hides none of them.
02

Where tiling falls in the build

Tiling sits near the end of the twelve stages, and it depends on four of them being genuinely finished first. This is why a splashback cannot be booked to a date in advance: it is measured off a benchtop that is itself templated off installed cabinets.

Demolition  —  old tiles and adhesive beds come out with the old kitchen, floor included where it is being replaced.

Preparation  —  patching, sheeting, levelling and waterproofing; the stage tiling actually depends on.

Cabinetry  —  carcasses fixed and levelled, which fixes the finished height of the bench and therefore the bottom line of the splashback.

Benchtops  —  templated, fabricated and fitted; wall tiling starts from the installed top, not the drawing.

Splashback and tiling  —  set out, laid, grouted and cleaned down once the top is in and the wall is proved.

Finishing  —  flexible silicone to junctions, trims and thresholds, then the final clean before handover.

The full sequence, from consultation through to handover, is set out on our 12-step renovation process.
Asked at the measure

Tiling over what is already there

The answer usually depends on what a knuckle sounds like when you tap the old tile.

Can you tile over existing tiles?

Sometimes. The existing bed has to be well bonded, flat and free of drummy sections, and the extra thickness has to be acceptable at the door threshold, at appliance openings and under the dishwasher. In a wet zone it is different: covering an old membrane means it can never be inspected, so we generally take that area back to substrate and start again.

Can we keep the floor and retile only the splashback?

Yes, and it is a common scope on a refresh. The floor is protected, the wall is stripped and made good, and the new tiling is set out to the existing bench height. That path is covered on Kitchen Makeovers.

Does the whole kitchen floor need waterproofing?

Not usually the entire floor. Attention concentrates on the wet zone around the sink and dishwasher, the wall and floor junction, and any penetration. What is required varies with the construction — a ground-floor slab in Moorabbin and an upper-level unit in Highett or Mentone are assessed differently at the measure.

Why does grout look different from the sample?

Grout dries lighter than it mixes, and the joint width changes how much of it you see. We confirm the colour against the actual tile and the finished bench rather than against a chart, and keep the same colour family through floor and wall unless a contrast is intended.

Read next

Kitchen Splashbacks — tile, stone and glass compared for the plane above the bench.

Kitchen Design — where format, height and setting-out are decided on paper.

Complete Kitchen Renovations — tiling as one stage inside the full strip-out and rebuild.

Kitchen Makeovers — new splashback and surfaces over sound existing carcasses.

Splashback ideas guide — patterns, heights and finishes worth looking at before you choose.

Next step
Tell us the room, the surfaces you want tiled and whether the kitchen is being replaced or refreshed, and we will arrange a measure across Moorabbin, Highett, Hampton East, Bentleigh, Bentleigh East, Cheltenham, Mentone and Heatherton.
Questions before that? Send them through the contact form.