Home / Kitchen Guides / Splashback Ideas
Measure book — guide, the vertical plane

Splashback ideas: tile, stone, glass and full height
The splashback is the one surface in a kitchen you look at from standing height, at close range, every day. Read it as a single continuous plane rather than a strip of tile trapped between the bench and the overheads and most of its decisions start to answer themselves: how high the material runs, where the joins fall, what the grout does to the format, and what happens where a window, a rangehood or a power outlet interrupts the run.
This guide sets out the four materials in common use, how each behaves at the join and the cut-out, and why the splashback belongs in the design stage beside the benchtop rather than at the end of the build.
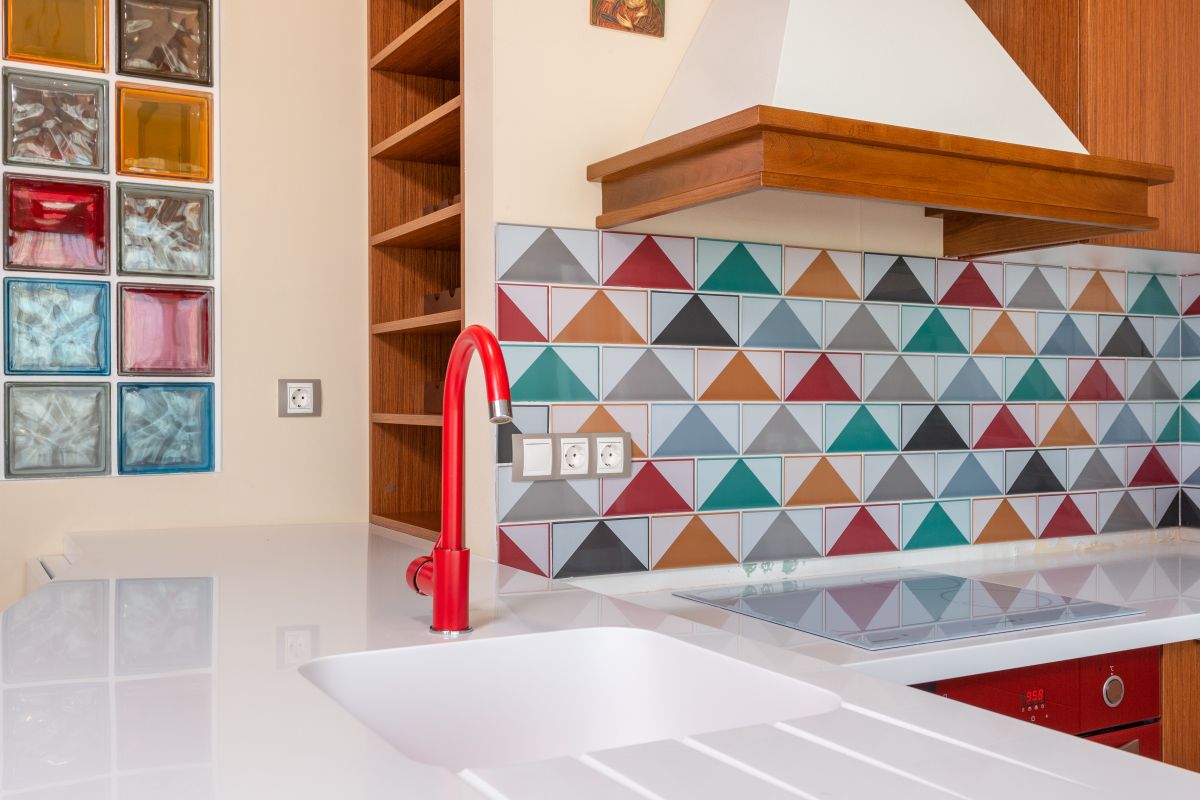
Contemporary kitchen with a colourful geometric tiled splashback, timber cabinetry and shelving, glossy white benchtops, a red tap and integrated cooking appliances.
Reference photograph: a geometric patterned tile read as a single plane above the bench run, with open shelving breaking into it. A pattern this strong sets the grid for the whole wall, so the tile size is chosen before the wall is set out.
Settle these five before you shop

01  Height. A conventional run to the underside of the overheads, or full height where there are no overheads at all.

02  Extent. Where the plane stops: at the end of the bench, at a wall corner, or returning into a window reveal.

03  Format. Sheet, slab or tile. If tile, the tile size sets the grid for the whole wall.

04  Grout. Matched so the format disappears, or contrasted so it is drawn.

05  Interruptions. Outlets, switches, the rangehood flue and any window — positioned on the drawing, not on the day.

The first two — height and extent — are settled on the drawing. Items 03, 04 and 05 are taken up in the sections that follow, under the same numbers.
Checklist item 03 — format

Chosen on appearance, lived with on maintenance. Ask how each one behaves at the join.
03

Four materials, four different sets of rules

Every splashback material will survive a kitchen. What separates them is how they handle the things a kitchen does to a wall: steam behind the sink, oil behind the cooktop, a cut-out for a double outlet, and a join that has to land somewhere. Those four behaviours are worth knowing before a sample is chosen, because they also decide when the material is ordered and how the trades are sequenced on site.
Material one

Tile

Ceramic or porcelain, in subway, square, hexagon or fish-scale. The least costly material and the most labour, because every square metre is set by hand. Ends, corners and cut edges are where the work shows.
Material two

Stone slab

Engineered or natural stone, usually cut from the same material as the bench so the veining carries up the wall. No grout, one or two visible joins, and templated after the benchtop is set rather than before.
Material three

Glass

Toughened and back-painted, ideally one sheet per run. Flat colour with a little depth, nothing to catch grease, no grout line at all. Cut-outs are made off site, so outlet positions have to be final before it is ordered.
Material four

Mosaic and metal

Small-format mosaic sheets and pressed or brushed metal panels. Texture and reflection at close range, at the cost of far more grout per square metre than any other tile — which makes grout colour the whole decision, not a detail.
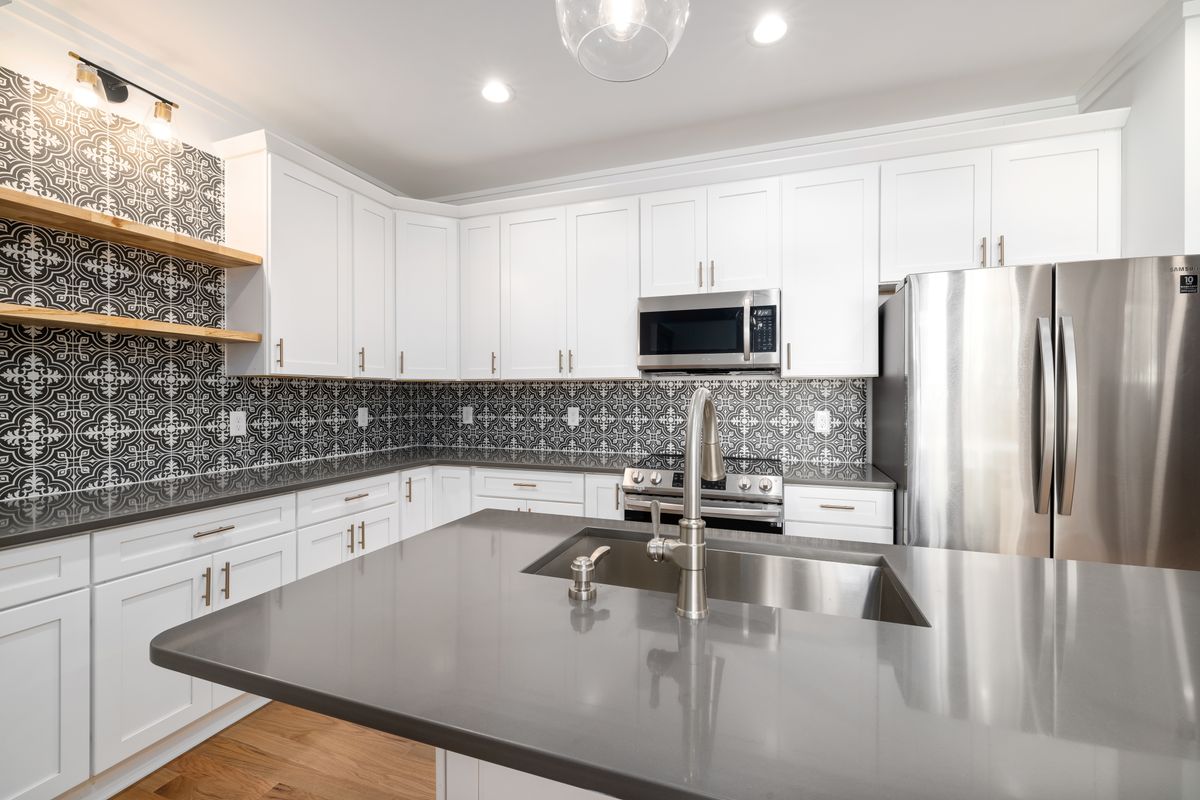
Bright white L-shaped kitchen with extensive cabinetry, patterned black-and-white tiled splashback, large island with sink, stainless-steel appliances and timber flooring.
Reference photograph: a high-contrast patterned tile above a long bench run. With a format like this, where the courses are struck from and how the grout reads decide whether the wall looks set out or improvised.
Checklist item 04 — grout04
Field note — setting out

Setting out, and what the grout decides

Setting out is the drawing that happens before the first tile is buttered. A splashback has a centre, two ends and at least one fixed object — usually the cooktop or the window — and the grid has to be struck from one of them. Start blindly in a corner and the last tile at the far end arrives as a sliver, or the joint runs a few millimetres off the centre of the rangehood and stays wrong for the life of the kitchen.
Horizontal setting out matters just as much. A 600mm run with a standard subway tile rarely divides into whole courses, so the cut course should sit low and tight to the bench where the bench edge reads as the line, not high under the cupboards where the eye is.
Grout is a colour decision wearing a hardware label. Matched closely to the tile, the plane reads as one surface and the format nearly disappears — the effect most people are after when they choose a large white tile. Contrasted, the same tile becomes a drawn grid and the pattern does the work of a feature. Mid-tone greys behind the cooktop hold their colour longer than a pale grout, and a full-height stone or glass run removes the question entirely, which is often the real reason it is chosen.
Checklist item 05 — interruptions

Nothing ruins a plane faster than something fixed to it that nobody drew.
05

Windows, rangehoods and the outlets nobody planned

The window. Bayside kitchens very often have a window sitting over the sink with only a few hundred millimetres of wall left around it. The choice is whether the splashback stops at the architrave or returns into the reveal in the same material. Returning it costs more in cuts and looks deliberate; stopping short leaves a painted edge that will be scrubbed every week. Decide before the tile is counted, because the reveal changes the quantity.
The rangehood. A canopy or undermount hood creates the one place on the wall where the grid is most visible, because you stand square to it. Centre the setting out on the cooktop, not on the cabinetry above, and confirm the hood height before tiling — raising it 50mm afterwards exposes untiled wall.
The outlets. Power is the detail most often left to chance and then apologised for. Outlets can be grouped into one horizontal band, aligned to a grout line, pushed under the overheads on a rail, or moved off the splashback altogether onto the end of an island or the underside of a cupboard. All of those are drawings, not decisions for the day the electrician arrives. In glass and stone the cut-outs are made off site, so positions must be signed off before ordering; in tile they can shift a little, but only if someone asks first.

A splashback is a small area of a kitchen and a large share of what you look at. The material is the easy half of the choice; the height, the setting out, the grout and the interruptions are the half that makes it look considered. All four are settled on the measure and design drawings, alongside the cabinetry and the benchtop, in Moorabbin and the bayside suburbs around it.